You have the option to setup your own buttons for easy access to windows that you use most often in Microsoft Dynamics GP. To customize the toolbar you can either:
- Click the Layout Button in the upper right corner of the screen.
- On your keyboard, type ALT+L
- Right click over the blue toolbar section of the screen.

-
- Main = “Traditional GP Navigation” options (This is the “Transactions, Inquiry, Reports, and Cards” drop downs)
- Standard (displays as icons) = Smartlist, Task List, Reminders, and My Reports.
- You can also add other toolbars for the modules you most use. Once you add the toolbar, it will display only icons by default:
Here is the Inventory Toolbar: ![]()
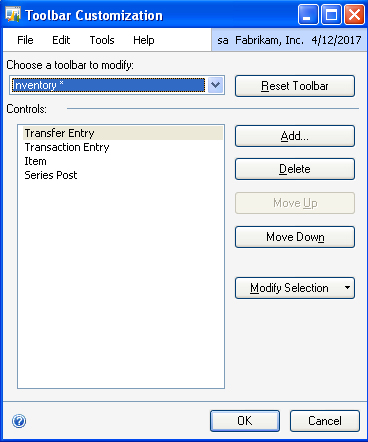
- You can further customize the toolbar by clicking the Layout Button>>Toolbars>>Customize
- Customizing each toolbar:
- Click ADD to add additional windows to the toolbar.
- Click DELETE to remove windows from the toolbar.
- Click MOVE UP/MOVE DOWN to change the order of the buttons on the toolbar.
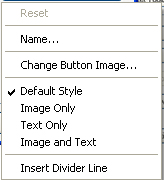
- Click MODIFY SELECTION to change the Name, Change to show both an icon and the name, change the icon, etc.
 |
 |
Note: If you change the name, it will also be changed throughout the system for your user. It will not affect other users. The new name with show in Area Pages, and also in the drop-down menu off of the “Main Toolbar”


