Note: This tip is taken from the Microsoft Dynamics GP Help Center and republished for your convenience.
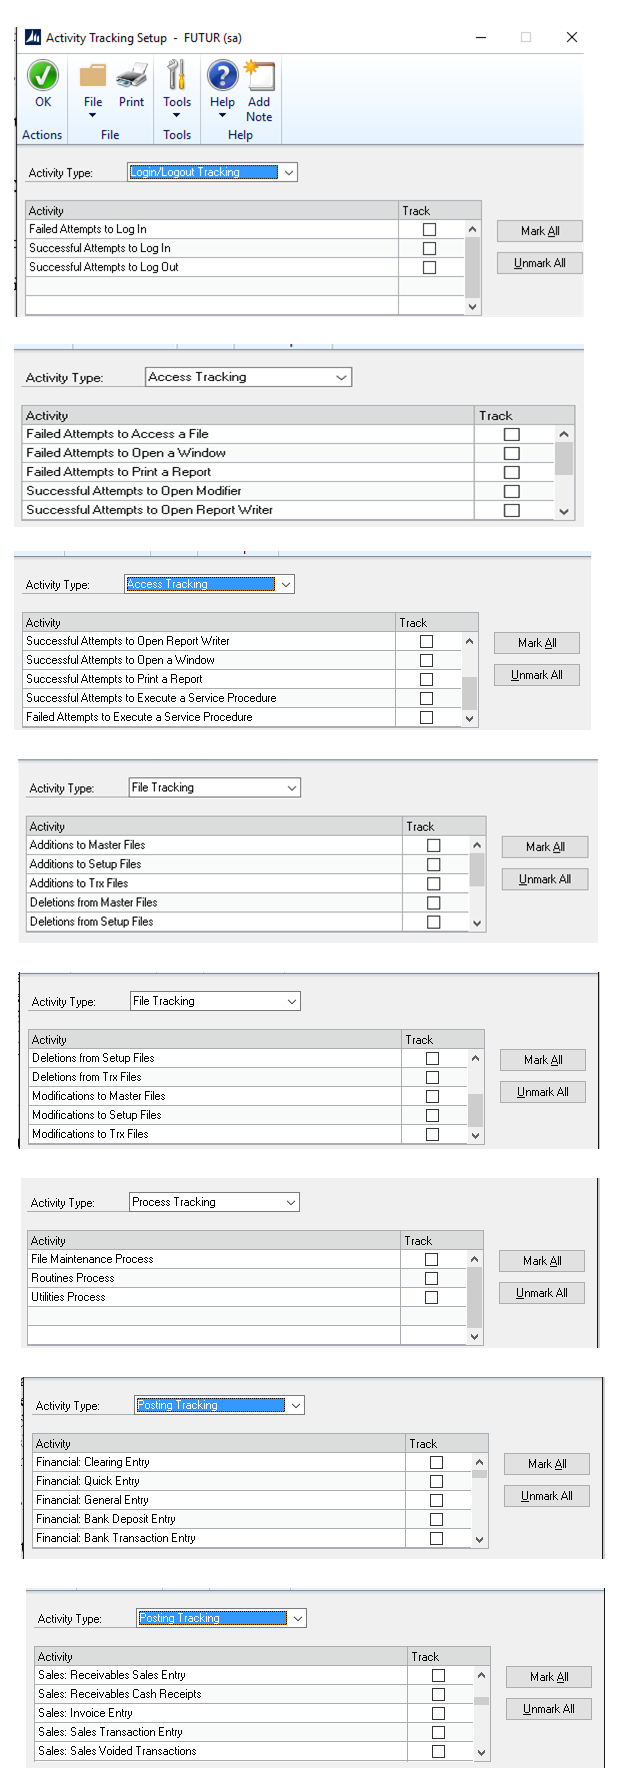
Using the Activity Tracking Setup window, you’ll mark the activities you want Microsoft Dynamics GP to track for each user in each company they access.
The table used to store activity information can become large in a short time if you choose to track all activity. To keep the activity table size to a minimum, track only the activities you really need to track and periodically remove the information you no longer need. Tracking successful window access and tracking any of the table activities will cause the activity tracking table to grow rapidly. For information about removing activity tracking detail,
To set up activity tracking:
- Open the Activity Tracking Setup window.
(Administration >> Setup >> System >> Activity Tracking) - Select an activity type. \
 It goes into all the Posting: Purchasing, Inventory, Banking etc.
- Using one or more of the following techniques, mark the activities you want to track.
- In the Activity list, mark the box in the Track column next to each specific activity you want to track.
- To track all activities listed for an activity type, choose Mark All. To stop tracking any of the activities that may have been marked for an activity type, choose Unmark All.
- Select a user and mark the companies for which you want activities tracked.
- Select a user ID for whom you want to track Microsoft Dynamics GP activities.
- In the Company Name list, mark the box in the Activate column next to the companies for which you want to track this user’s activities.
- Repeat steps 5 and 6 for the other users you want to track activity for.
All of the users selected will have the same activities tracked.
- Choose OK to save your entries and close the window.
- Review the activity tracking information you’ve entered using the Activity Tracking Setup Report. While the Activity Tracking Setup window is displayed, choose File >> Print.
PRINTING/REMOVING ACTIVITY TRACKING DETAIL
Administrative>>Utilities: Activity Tracking Detail
![]()
Removing activity tracking detail
Use the Remove Activity Tracking Detail window to remove records from the Activity Tracking Table, print a report that shows the information in the table, or both. All activities you track are recorded in the Activity Tracking Table. The size of the table can increase very quickly, even if you track only a few activities, so you’ll need to remove data from the table periodically.
Be sure to back up your company’s data before removing activity tracking detail.
To remove activity tracking detail:
- Open the Remove Activity Tracking Detail window.
(Administration >> Utilities >> System >> Activity Detail) - Select an activity type.
- Using one or more of the following techniques, mark the activities you want to remove or print a report for.
- In the Activity list, mark the box in the Remove/Print column next to each specific activity you want to remove or print a report for.
- To remove or print all activity detail listed for an activity type, choose Mark All. Choose Unmark All if you don’t want to remove or print all activity detail.
- Select which range type of activity detail.
- Enter or select a range of activity detail.
- Choose Insert to insert the range.
- Choose whether you want to remove the activity detail, print a report, or both.
- Choose Process to remove the activity detail. If Print Report was marked, the Activity Tracking Report will print.
For more Microsoft Dynamics GP Tips visit www.calszone.com/tips
By CAL Business Solutions, Connecticut Microsoft Dynamics GP Partner, www.calszone.com


