There is a better way to do budgets in Microsoft Dynamics GP – the Excel Budget Wizard for GP. This wizard is accessible via Financial >> Cards >> Budgets, simply click the New button to initiate the Wizard. Its setup screens are intuitive, guiding even first-time users seamlessly through the process. The only potential stumbling block might be selecting the Budget Calculation method. While percent budgets offer advantages, many users opt for a “Blank” Excel template, which they can customize.
For a more informed budget, consider having the wizard include worksheets with actual fiscal year amounts. Additionally, take a few extra minutes to carefully choose which accounts to include, making your budget spreadsheet more manageable. Segmenting accounts by department or cost center allows each manager to oversee their own budget effectively.
Once the Budget Wizard process is complete, an Excel template is generated. Note the file name and location for future reference. While you can add or remove account rows in the template, ensure you maintain the integrity of the structure. Avoid altering header rows, the total row, or any columns. You can input values or copy/paste into period cells but refrain from overwriting the total column. Remember to enter revenue or any credit balance accounts as negative numbers.
See the Step-By-Step Instructions Using the Excel Budget Wizard for GP Templates (Exporting & Importing)
EXPORTING A BLANK BUDGET
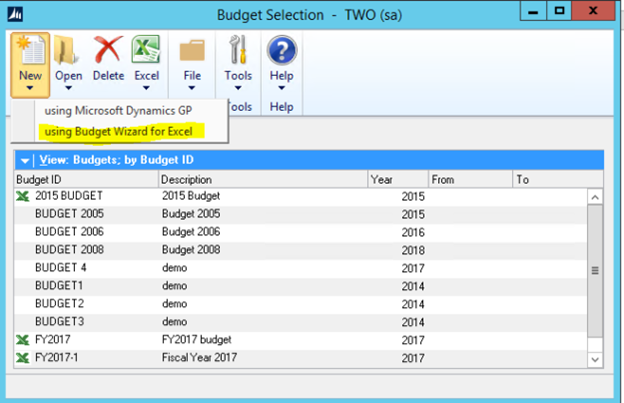
Go to Financial>>Cards>>Budget
Choose New
Then Using Excel Budget Wizard for GP


NEXT

Fill in an ID for this budget
For Frx budgets make sure that the budget name if it has a space use and underline 2010_Budget
Name the Fiscal Year you are creating this for.

For a Blank Budget: Use Blank Budget
NEXT

For blank budget just choose next

Choose which accounts you want
NEXT

You can tell it which segments you want here.
NEXT

You can uncheck accounts you don’t want or if you want to add accounts that you took out.
NEXT

A New Workbook
NEXT

One Last chance to review and FINISH

Will ask you for an excel name for your Budget and where you want to place it.
SAVE
Will open your budget

If you already have a budget just make sure that it has the following and you can import it.
2 Blank rows on top
Then Column Descriptions have to be there for:
Account
Description
Beginning Balance
Periods 1-12
Total
They just have to exist, they don’t even have to be named the same.
IMPORTING A BUDGET
Go to Financial>>Cards>>Budgets
Excel
Import from Excel


NEXT

Here is where you can bring in the blank EXCEL budget you created in step 1.
Or if you just did the layout, you can do a NEW Microsoft Dynamics GP Budget
If you say new then you will have to name it same as we had to name in the first budget
And you will have to tell what year (Fiscal Year) and show it where it is.
Existing:

Choose your budget that you saved and filled in
Select the Worksheet that the budget is in.

Verify and choose FINISH
It will begin importing (see below)

And the last step it will open your budget in GP using Excel Budget Wizard for GP.
One final tip: consider creating your templates early to input figures directly, rather than building separate budget spreadsheets and then transferring data into the template later on.
By CAL Business Solutions Inc., Connecticut Microsoft Dynamics GP / 365 BC & Acumatica Partner, www.calszone.com


