Have you ever been working with a SmartList and needed to add just one more piece of information to make it complete, but when you look for it in the column chooser it is not there?
That’s when SmartList Builder comes in handy.
Out of the box SmartLists are great, especially for new users; but the longer you use Microsoft Dynamics GP and the more you get to know your data the more sophisticated your reporting needs become. The out of the box lists just may not have everything you need.
And you might need to get information that is stored in different places. For example, in the screenshot below, all those SalesPad tables, views, and user fields that were previously only accessible within SalesPad, are now accessible within a SmartList with SmartList Builder.
One SmartList I made for a distribution company is related to Lot Numbers. There is not an out of the box SmartList to show item or sales lot number information but that was an important report for them. We were able to write a SmartList for Inventory On Hand Lot Quantities as well as for those fulfilled or sold on sales documents.
There are also times where item information would be really helpful to sales reporting. This distribution company uses the Item Generic Description field to denote the vendor for the product, and they send a lot of sales reports back to the vendor. With SmartList builder we could add the Item Generic Description on to the Sales Line Item info and they have all the data in one report.
If you want more flexibility you can use SQL views.
The benefit of using a SQL view over tables is that you have more flexibility with how you combine your tables. SmartList Builder only offers a few methods of joining your tables together; SQL has more options and the one you choose will change the data that is returned. How you join your tables is always important. Users who are comfortable using SQL can join their tables, pick their fields, write calculations and create their view. Granting permissions is fairly simple, then you have your own fully custom view to return exactly the info that you wanted.
Here are instructions on how to create SmartList Builder reports based on SQL views or tables:
Microsoft Dynamics GP>>Tools>>SmartList Builder>>Security>>SQL Table Security
- Check the box by the company ID (PAPER)
- Choose Table or View (Views have more info. Tables are specifically 1 single source of data)
- SalesPad has setup some views that work well for reporting. They start with spv
- Check the box by the Table or View
In GP: Open SmartList Builder
- Click the + to add a table.
- Choose SQL Table (even if you are adding a View)
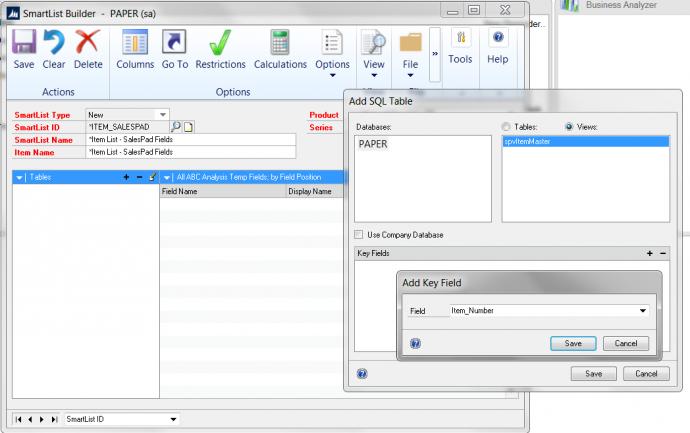
- In the Add SQL Table window, select the Database (PAPER)
- Pick Table or View (depending on what you did earlier).
- Check box called “Use Company Database”
- Click on the View name that you want on the SmartList report.
- Hit the + sign to add a Key field. Usually it is the ID of the window (for Items, Customers, Vendors) or the Document Number for Transactions. Basically it is the unique fields on the window.
- Hit Save
**Check box called “Use Company Database”
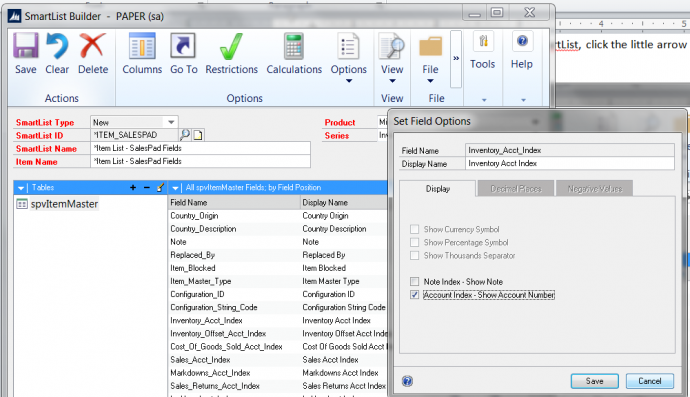
- To Mark all fields to show automatically in SmartList, click the little arrow by “Default” and hit Mark ALL.

- Uncheck fields you want to hide.
- Click the Blue Arrow by the Display name to set field options (i.e. How to show dates, notes, and GL accounts)
If you want training on how to use SmartList Builder, or want us to create custom reports for you, call CAL Business Solutions. 860-485-0910 x4 or sales@calszone.com
For more Dynamics GP Tips and Tricks go to www.calszone.com/tips and sign up for our Tips and Tricks e-newsletter.
By CAL Business Solutions, www.calszone.com


